Showing posts with label DIY. Show all posts

Friday, 4 September 2015

DIY: Kitchener Stitch

Kitchener stitch is a method by which to join two live edges of your knitting.  It's particularly useful for top-down socks, because it doesn't leave a bothersome seam at your toes.  I also use it at shoulders, because this technique gives an almost invisible finish, making the shoulder look like one continuous piece of knitting.  It's not the strongest seam, but I've yet to have any issues with my shoulders unravelling...

To do this technique, you'll need to get set up with:
tapestry/yarn needle
two sets of live stitches on their respective needles, wrong sides facing, with needle points facing the same direction

The first few times you use kitchener stitch you might feel like the tension is completely off, or that it's incredibly uneven.  This will probably just improve with practice, but a good tip is to remember not to pull your stitches too tight - there's a great draw to do this, but don't give in!


Starting - for the first st on each side you want to do the following:

Hold your wrong sides together, with needle points facing the same direction.
1. pop tapestry needle through 1st stitch on closest needle, purlwise.  Pull needle and yarn though, but leave the stitch on the needle.
2. pop needle through first st on back needle, knitwise. Again, leave st on needle and pull yarn through.


Continuing - for the rest of the stitches until the ones on the end, you'll want to do this:
1. Needle into first st on front needle, knitwise.  Slip stitch off needle. 
2. Needle into next st on front needle, purlwise.  Don't slip stitch off needle.  Pull yarn through. 
3. Needle into first st on back needle, purlwise.  Slip st off needle.
4. Needle into next st on back needle, knitwise.  Don't slip stitch off needle. Pull yarn through.

Repeat until 1st remains on each needle.


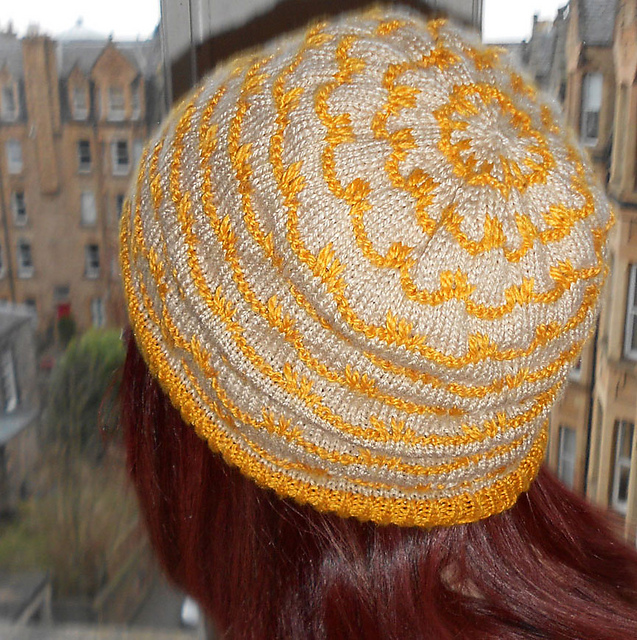
As you knit, your work will start to look like this in the image below - with a little practice your seam should look like just another row of knitting.  Pause every so often to adjust tension in your stitches, you can always do them loose individually and tighten them at regular intervals by pulling on your working yarn as required.

You want to keep kitchener-ing until you have one st left on each needle.


For your final stitches, you want to do step 1, then step 3 above. 
Now you have all the joy of sewing in your ends left.


Hopefully this was helpful!
I have a new DK cardigan pattern coming out on 1st October which uses this technique - please let me know (owlprintpanda@gmail.com) if you'd like to test-knit!


What have you been knitting recently?  Any favourite seams?


Friday, 6 December 2013

DIY: Christmas Decorations

The gale force winds and snow have finally arrived in Scotland, so it's definitely time to use the remaining weekends for christmas craftyness :D  

Whilst browsing I spotted a few great ideas and just had to share them.  

Great picture Idea

Stringy Snowman

Pegs for advent

Santa Strawbs

In our old flat in Viewforth Square in Edinburgh, our amazing neighbours made these little gentlemen for us!  We shall have to re-create it this year :D

Tree Nails

Mulled Wine Syrup!

Pompom Wreath

Reindeer Napkins

Teacup Decorations

Paper Stars

Mitten Garland

Mashmallow Hearts
The original idea for this was frozen whipped cream, but wouldn't they be amazing as cookie-cut cinnamon mashmallow?!

Housey Gift Box

Havew you been getting crafty this month?  What have you been making?  I need to find a little crochet snowflake pattern...

x


Sunday, 27 October 2013

DIY: Bru Shawl & Glasgow Getup

Get the pattern here on Ravelry.

What better time to partake in a photoshoot than a dreary, drizzly, windy glasgow sunday afternoon.  No point in pretending it's sunny here, eh?

Or waiting on the sun to make an appearance either.  Might take a while.

Anyhoo, here are some little photos of a certain fizzy orange beverage inspired shawlette.  First comment & retweet on twitter gets a free copy :p


You can also grab it here on Ravelry or in my etsy store.


p.s.  do you have any idea how hard it is to take photies of a shawl in the wind?


Whilst we're on the subject, here are a few of my favourite glasgow based bands:

Belle & Sebastian, in particular 'she's losing it' with my favourite line right in the chorus, "when the first cup of coffee tastes like washing-up".  Also, mainly for the running-around-in-glasgow-so-lets-point-at-the-bits-we-know video, 'I'm a cuckoo'.

What's your favourite local band?  Comments so I can discover them all!

And, not to forget, I think 'The Dykeenies' might also be up there in my favourites, oh and 'We Were Promised Jetpacks'.  Now go play with youtube my lovely blog readers, google some glasgow bands.


Saturday, 25 May 2013

DIY: Washing Peg Bag!


This fabric has been sitting in my stash for a little while now, and I could think of no better use for it than a little peg bag.  

Not that I have a washing line... but I have pegs.  Therefore I need a peg bag...


You will need:
  • one (small) coat hanger
  • two fat fabric quarters
  • scissors
  • sewing machine / needle & thread
  • ribbon or bias binding (optional)

Step 1: You want to cut out your pieces

There are three pieces involved, one for the back and two for the front.  The front pieces overlap to make a flappy opening.

Place your hanger onto your backing material, and mark yourself about 10 inches of rectangular-ish at the bottom bag. Obviously you can make this bigger or smaller, especially if you aren't using a children's hanger.  


Cut this out, and use it as a template for your front pieces. To do this:
  • mark the 'opening line' this should be somewhere near the bottom edge of the hanger, as shown by the scissors in the photo below.
  • next, you want to mark both 1-2" up from this, and 1-2" down.  This is because you want your front pieces to overlap!


(optional) If you like, you can pop a little border onto the top front piece, to make the opening nicer.  I used a strip of ribbon in a bias bind style, sewing the ribbon onto the right side before folding it over it's own stitching onto the wrong side and sewing from there too.


So you now have your completed pieces.  Make sure your opening is lined up properly and pin the front and back together, right sides facing each other.


Before you sew the pieces together, you may want to add a little seam to the bottom front piece.


When sewing, remember to leave an inch at the top of your bag unstitched, as you will need to pop the neck of the hanger through here!  


:) x


Sunday, 31 March 2013

Easter Stitch Marker Sale!


Yey for bunnies and chocolate eggs :D.  For one day only, there's 20% off all stitch markers in my etsy store!

Just use the code OWLPRINTPANDAEASTER at the checkout for your discount :)


Monday, 25 March 2013

Dandelion Hat!


Yey!  It's finally published!  After convincing my lovely man to take some wee photos of this amazing hat, and all the lovely test knitters finishing their brilliant versions, it is time :D

D'ye like it?? 

Pattern Information & Construction Notes:
This is a slouchy style hat, knit in the round using mosaic colourwork detail. Knit from ribbed brim, on smaller needles for snug fit, through patterned body on the larger needles up to the crown in two colours. You could also use the jogless stripe technique to ensure seamless transition between colours.
Instructions are provided for four sizes.
Finished Measurements:
Adult (Toddler, Child, Large Adult) finished size to fit 20”(16”,18”,22”) circumference heads. The standard length of this slouchy hat is approximately 10” (8”,10”,10”), though directions are included should you wish to vary this.
Yarn
Two complimentary shades of 4ply/sport yarn are required, approximately 200 yards of main colour and 100 yards of alternate colour will be required for the adult size. Allow 250/120 for larger size.
Hat shown is knit in Fyberspates Scrumptious 4ply/sport, main colour (MC) oatmeal, alternate colour (AC) gold. This is a gorgeous silky smooth, shiny yarn. Though the hat would work equally well on another 4ply or sportweight yarn.
Needles
3.5mm (US 4) Double Pointed needles (or your preferred circular knitting method). You may wish to use 3.25mm or 3mm needles for the ridged brim to ensure snug fit.
Gauge
This is a lovey silky slouchy hat, so don’t worry too much about gauge. If you really really want exact gauge, the shown hat has 30 stitches and 40 rows in 4” in the wave stitch used for the body.

You can grab the pattern here on Ravelry, or here on Etsy :)


Friday, 8 February 2013

Crafty Valentines Gifts for You and Him


Hello lovelies!

I wrote a little valentines piece as a guest blogger the other week and thought I'd share it with you too!  I thought I’d go all out, and since valentines is coming up soon, have a bit of a romantic DIY extravaganza. 

Around this time of year I panic a little – it’s alright for the guys, they have chocolate and roses to fall back on, but what do we buy them??  Are we even supposed to buy them something?  Even if I’m not supposed to, will I feel bad when he has given me a present and I have nothing to return?

As ever, the answer is of course to get crafty.  If it’s not much, at least its handmade and comes from the heart, right?

Also, we need to treat ourselves at this time of year!  Bath, candles, new dress anyone?  So here are a few little crafty ideas with a valentines theme which caught my eye,  some valentines gifts for you and him.


The Card:
Crayon card - how cute are these?!  They are definitely on my 'to make' list for this year, though I'll need to wait until the other half is out the house to go melting all the crayons!

Valentines Crafts for You & Him @OwlPrintPanda.blogspot.co.uk

The Wrapping:
Foxy gift bag - who needs valentines wrapping paper when you can have a foxy gift bag?!  In fact, who needs wrapping paper ever again?

Valentines Crafts for You & Him @OwlPrintPanda.blogspot.co.uk


Paper Roses - it's the little touches which often finish off a gift, so if you are gift wrapping, why not top it off with some string and paper roses?  What the heck, why not top off the fox gift bag with them too.  They're quick and easy, and look more difficult than they are.

Valentines Crafts for You & Him @OwlPrintPanda.blogspot.co.uk


The Gift:
You light up my life - This has to be one of my favourite crafty finds and I've been waiting for ages to use it!  Paperweight or shelf ornament, this little cutie makes me smile :)  So will hopefully make him grin too!

Valentines Crafts for You & Him @OwlPrintPanda.blogspot.co.uk


Valentines Scratch Cards - oh the possibilities for what you could hide behind these little silver windows!!!  I shall leave that up to you...
Valentines Crafts for You & Him @OwlPrintPanda.blogspot.co.uk


For You:
Valentines Heart Puff Garland - quick and easy to make, I have one of these garlands on my fireplace and it makes me feel warm and fuzzy inside (awww).   You can also make them into keyrings!  If you don't knit yourself, you can find the garland and keyring in my etsy store too :)

Valentines Crafts for You & Him @OwlPrintPanda.blogspot.co.uk


The Food:

Sweetie Pie Pops - I've never laid eyes on anything like this before!  Definitely on the to-do list for next month! 

Valentines Crafts for You & Him @OwlPrintPanda.blogspot.co.uk


What are your knitting/crafting plans this week?  Anything romantic on the way?

Amanda :) x


Related Posts Plugin for WordPress, Blogger...